Hudson Valves

Hudson Valves
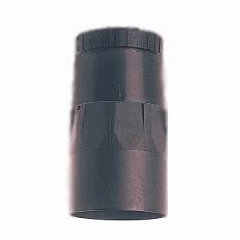
The Hudson Valve, 150 degree Fahrenheit, with its new and innovative design, will solve your water level control problems once and for all. The Hudson Valves are damage-resistant automatic float valves for water level control This compact, virtually indestructible float valve is well adapted to a wide variety of applications, from personal home use to large-scale industrial use. The Hudson valves are ideal for applications where it is necessary to control the level of water, such as, Aquariums, Grounds Maintenance, Livestock Tanks, Car Washes, Holding Tanks, Ponds, Evaporative Coolers, Irrigation Systems, Swimming Pools, Fountains, Landscaping, Cooling Towers And Much More...Features include: No lever arm; No exterior moving parts; Resistant to freezing; Practically Indestructible; Installs in seconds; No float ball; High volume; Anti-siphon; Rust-proofThe Hudson Valve are guaranteed by the manufacturer for two years when used under normal operating conditions. Malfunctioning parts will be repaired or replaced without charge when mailed prepaid back to the manufacturer with proof of purchase.
| Pressure-PSI | 10 | 20 | 30 | 40 | 50 | 60 | 70 | 80 | 90 | 100 |
|---|---|---|---|---|---|---|---|---|---|---|
| Flow-GPM 1/2" Valve | 9.7 | 13.6 | 16.7 | 19.3 | 21.6 | 23.6 | 26.4 | 27.0 | 28.9 | 29.8 |
| Flow-GPM 1" Valve | 31.2 | 44.3 | 53.8 | 62.7 | 69.3 | 75.9 | 81.3 | 86.6 | - | - |

Questions & Answers
- How does the valve work?


- The valve operates using a float and a control diaphragm chamber. When hooked up to a water source the valve will allow water to flow through it until the water reaches the bottom of the valve. As the water level rises it causes the float inside of the valve to rise allowing the diaphragm chamber to fill and close the valve.
- What type of tubing/pipe should I use to install my Hudson Valve?
- Make sure that your tubing/pipe is of an adequate size: For the ½ Valve no smaller than ¼ and no bigger than 1; For the 1 Valve no smaller than ½ and no bigger than 2
- How do I install my Hudson Valve?
- Do not use pipe compound. Use plumbers Teflon tape on threads of water supply pipe. Screw Hudson Valve on to water supply pipe; hand tighten only. Turn water source on full volume. Make sure valve is mounted stably the valve will not work if it is not secure. The valve cannot be submerged. The valve must be mounted vertically.
- Where will the valve shut off?
- The valve will shut of about 1 ½- 2 up from the bottom of the valve depending on pressure (the higher your water pressure the higher up on the valve the water will shut off). NOTE: there will be a short delay in shut-off the first time the valve is used while the control chamber fills with water.
- Will my valve work in liquids other than water?
- The Hudson Valve is designed to be used in water. We only recommend using it in water. Hudson Valves will only warranty valves that have been used in water. This is not to say that the valve will absolutely not work in other liquids. We have customers that use it in a variety of liquids, but we have not tested it in anything other than water, and thus cannot recommend its usage with any other liquids.. We do know the valve will not work with salt water as the supply source.
- Why wont my valve shut off?
- The valve needs to be cleaned periodically depending on the cleanliness of the water source. Wash the valve and valve parts with fresh water. Dirt, rust, sediment and sand can build up on the valve and cause it to malfunction.. The valve has two very important holes that run through the center of it. If either of these holes becomes clogged, the valve will not shut off.
- How do you check the holes on the valve?
- To check the holes take the valve apart: Remove the strainer cap from the stem of the diaphragm.. Hold the diaphragm up to the light and make sure that the hole that runs through the body of the stem is free and clear. Drop the float out of the body of the valve. To do this, turn the valve upside down. Use a flat head screwdriver and gently push down and out on the clip. Hold the body up to the light and make sure that the hole that runs through the body of the valve is free and clear. If either of these holes is clogged, flush it out with water or use a small needle to help clear the hole. Do not force any object into either hole, as the valve will not work if the size of the hole is altered.
-
Why wont the valve shut off?
- The valve has to have more than a trickle of water coming to it in order to get it to shut off. If you have less than 10 PSI of water pressure, your valve may not be getting enough flow to it to make the valve seal. Make sure that your water source is turned on full volume. Make sure that your tubing/pipe is of an adequate size:
- What size pipe should be connected to the Hudson Valves?
- :For the ½ Valve no smaller than ¼ and no bigger than 1. For the 1 Valve no smaller than ½ and no bigger than 2.
- Why wont my valve open?
- The insert in the body of the valve may be clogged. To check this, remove the cap from the top of the valve. Remove diaphragm and retainer ring. Turn valve over and remove clip (you can use a flat head screwdriver and gently push down and out to do this) and drop float out of the body of the valve. Hold the valve up to the light and look through the metal insert in the center of the body. If it is clogged, flush is out with water. If this doesnt clear the insert, use a small needle to gently push the debris out. Then flush with water again to clean. There isnt enough water flow coming to the valve. Your water source must be turned on full volume. We recommend having at least 8 lbs of pressure.
- After I install the valve, what do I do if I hear water hammer or other noise in my line?
- The water hammer can be caused by too much pressure build-up behind the valve. Under high-pressure conditions, installing a pressure-reducing valve before the Hudson Valve may alleviate the problem.
- When do I use a continuous flow disc?
- The continuous flow disc is designed to be used only during the winter in freezing climates. When installed, it will allow the valve to keep a slow trickle of water moving through it at all times. When installed, the valve will not fully shut off. The purpose of this disc is to prevent freezing of pipes during the winter. When using a continuous flow disc, you will need an overflow line to take excess water away as the disc will allow the valve to overflow the tank.